
Hello friends. If you are not completely new to the software testing or development field, you must have heard of the automation tool Selenium. In this tutorial, we will help you get started with Selenium using your favorite programming language Python.
In this Selenium with Python tutorial for beginners, we will start from the very beginning. That is with the installation of Python and Selenium. After that, we will create a script, automating a flow with this setup. Along the way, we will be learning about the different Selenium concepts. So, let’s begin.
Content
Why Selenium?
Selenium is an open-source automation tool. Using Selenium we can automate web applications. It was introduced in the year 2004 as an internal project by ThoughtWorks. Soon it became the market leader, among the different free and paid automation testing tools.
Features and Advantages of Selenium
- It is an open-source tool. It is free with no licensing fee.
- Selenium supports multiple browsers. Some of these are – Chrome, Firefox, Internet Explorer, Microsoft Edge, Safari, Opera, etc.
- It is platform-independent. Can work seamlessly with all the popular platforms – Windows, Linux, Mac.
- It supports all the widely used programming languages. For example – Python, Java, Ruby, C#, JavaScript, etc. Out of which both Java and Python are widely used and have the major market share.
Selenium Components
- Selenium IDE – It is a record and playback tool. Using this we can quickly automate a simple workflow. But using this we can not create a full-fledged test automation suite.
- Selenium WebDriver – This is the most widely used component of Selenium. It interacts with the different browsers using browser drivers like – ChromeDriver, FirefoxDriver, InternetExplorerDriver, SafariDriver, etc.
- Selenium Grid – Selenium Grid is the Selenium component that is used to run Selenium tests in parallel across different browsers and operating systems.
There is one more component of Selenium – Selenium RC (Remote Control). But it is deprecated now. So, we can safely exclude it from this Selenium WebDriver with Python tutorial.
Why Selenium with Python?
Python is a high-level, interpreted, object-oriented programming language. It is one of the fastest-growing programming languages in the world right now. Let’s see some of its features now.
Features and Advantages of Python
- It is easy to learn and has fairly readable code. Due to this, it is easy to write and maintain Python code.
- The code written in Python is considered much faster and reliable as compared to most of the modern programming languages.
- It supports all the major platforms. Also, allows running the same code on different platforms without the need for re-compilation.
- There are various open-source Python libraries and frameworks available. It also has a very active and large community support backed by companies like Google, Facebook, and Amazon.
- Python is an interpreted language that makes debugging of Python code very easy.
Selenium WebDriver Architecture
In order to understand the working of web UI automation on different browsers using Selenium, we need to understand its architecture. The Selenium WebDriver architecture comprises of four components-
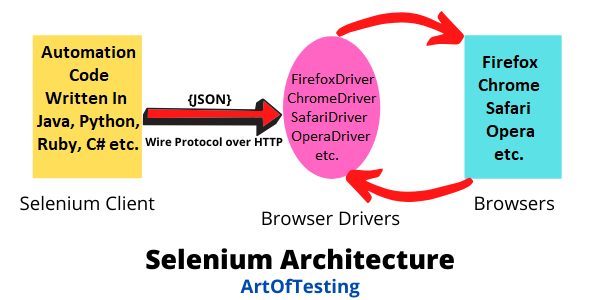
- Selenium Client – Selenium Client Library or the language bindings allows us to write the Selenium automation scripts in the language of our choice – Java, Python, C#, Ruby, Javascript, etc.
- JSON Wire Protocol over HTTP – The JSON or JavaScript Object Notation protocol wire protocol provides the capability of transferring data between the client and server over the internet.
- Browser Drivers – In order to run Selenium scripts on a particular browser, we need to pass the command to the respective browser. For this, each browser has its own browser driver. These browser drivers allow communication of the Selenium script with the different drivers without revealing the internal logic.
- Browsers – This component is straightforward. The browsers receive the command and call the respective method to perform the automation task.
This completes the theoretical part of this tutorial. Time for some hands-on now. Like I said in this tutorial, we will explain and do everything from scratch, so we will start with Python installation. If you already have Python installed on your machine, you can directly skip to the Selenium setup section.
Install Selenium Python on Windows
Install Python on Windows
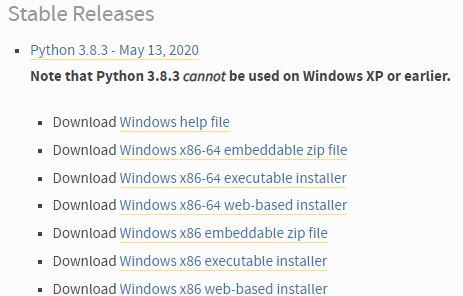
Navigate to Python for windows download page and under ‘Stable Releases’ click on the installer of the latest Python release or the release of your choice. Make sure to install the correct version of the installer based on the configuration of your system – 32 or 64 bit.
Once installed, you can check the installation by opening the command prompt and running the command-
python -V
You will see the installed Python version as the output.
Install PIP
Next, we need to install PIP on Windows. PIP stands for “preferred installer program”. It is a tool to install and manage python packages from the command line. Steps to install pip on windows-
- Download get-pip.py file from here – https://bootstrap.pypa.io/get-pip.py and place the file where you want to install PIP.
- Navigate to that folder and run the command – python get-pip.py
- Verify successful PIP installation with the below command.
pip -V. You will get the pip version listed.
Install Selenium using PIP
Once, python and PIP are installed in your machine, we can simply install Selenium with the below command-
pip install selenium
Install Selenium Python on Mac
Python is already installed in the Mac OS and you can verify the same using the below command-
Python -V
In case you want to install the latest version of Python you can do the same using brew.
brew install python3
Install WebDriver on Mac using PIP3
pip3 install selenium
After this you can skip to Download Browser Drivers section directly.
Install Selenium Python on Linux
For Ubuntu 16.10 and above you can use the below command-
$ sudo apt-get update
$ sudo apt-get install python3.6
For other versions on Ubuntu-
$ sudo apt-get install software-properties-common
$ sudo add-apt-repository ppa:deadsnakes/ppa
$ sudo apt-get update
$ sudo apt-get install python3.6
In the case of other Linux distribution, you can use dnf-
$ sudo dnf install python3
Install Selenium using PIP on Linux
$ sudo apt-get install python-pip
$ sudo pip install selenium
Download Browser Drivers
In the Selenium WebDriver Architecture section, we studied that Selenium required different browser drivers to interact with the browsers. So, we need to download the same. Drivers for some of the popular browser drivers are-
ChromeDriver – https://sites.google.com/a/chromium.org/chromedriver/downloads
FirefoxDriver – https://github.com/mozilla/geckodriver/releases
Internet Explorer Driver – 32 bit Windows IE 64 bit Windows
Python IDE
Now, we need a Python IDE like PyCharm or you can configure Python on Eclipse with PyDev a Python IDE for Eclipse. In order to configure PyDev plugin on Eclipse, follow the steps mentioned here – rose-hulman.edu.
In this tutorial, I will be using PyDev but you can use any IDE of your choice.
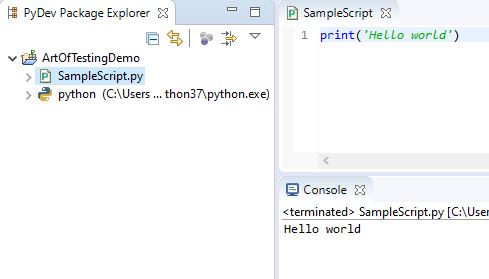
Let’s first test the Python setup with a simple HelloWorld program.
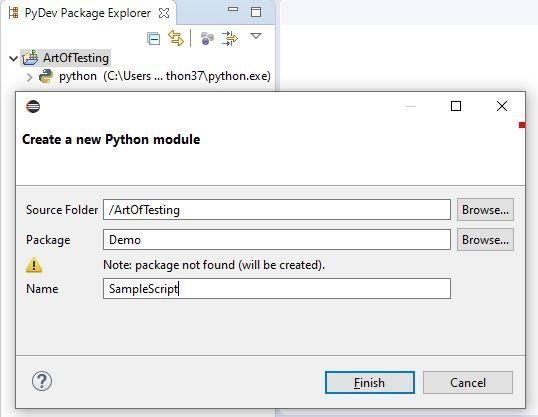
Next, we can create a simple Python project to verify this setup using a sample Selenium with a Python script for the Chrome browser.
Selenium with Python Sample Script
from selenium import webdriver
driver = webdriver.Chrome(r'C:\Users\drivers\chromedriver.exe')
driver.maximize_window()
driver.get("https://google.com")
assert "Google" in driver.title
driver.close()
On executing this script, the Chrome browser will launch with Google.com. After that it will verification of title with the value – “Google”. Finally, the browser will close.
Let’s understand the meaning of each line of code given in the sample script.
from selenium import webdriver
This is the import statement to import the webDriver.
driver = webdriver.Chrome(r'E:\drivers\chromedriver.exe')
With this statement, we are opening a ChromeBrowser. Just remember to pass the correct path to the ChromeDriver.exe file.
driver.maximize_window()
This statement will maximize the browser window.
driver.get("https://google.com")
The driver.get() command opens the URL passed as parameter.
assert "Google" in driver.title
This assert command validates the title of the window with the value – ‘Google’.
driver.close()
This statement closes the browser.
With this, we have completed the simple setup of Selenium with Python. I hope with this Selenium with Python tutorial, you could easily set up your machine and run the sample script.