
When you are creating a Web Service, you need to ensure that your REST APIs work well for all your Test Cases. RESTful APIs use HTTP requests such as GET, PUT, POST, DELETE, etc. to send and receive data. If there is any error, the server won’t be able to fetch the data for you and you will be served with an error code. Thus, performing API Testing should be on your priority list if you are creating a web service using REST APIs.
In this article, we are going to demonstrate how you can use the TestSigma tool to perform testing of RESTful APIs or Web Services. TestSigma tool provides a seamless experience to developers allowing them to create Test Steps in natural language. It allows you to test Response components such as Status Codes, Header, and Body of various kinds of requests such as GET, PUT, POST, DELETE, MODIFY, etc.
Without any further ado, let’s dive deep into performing API Testing with TestSigma Tool. In this article, we will be using JSONPlaceholder which is an online service providing fake data for your RESTful API Testing.
Content
Preconditions
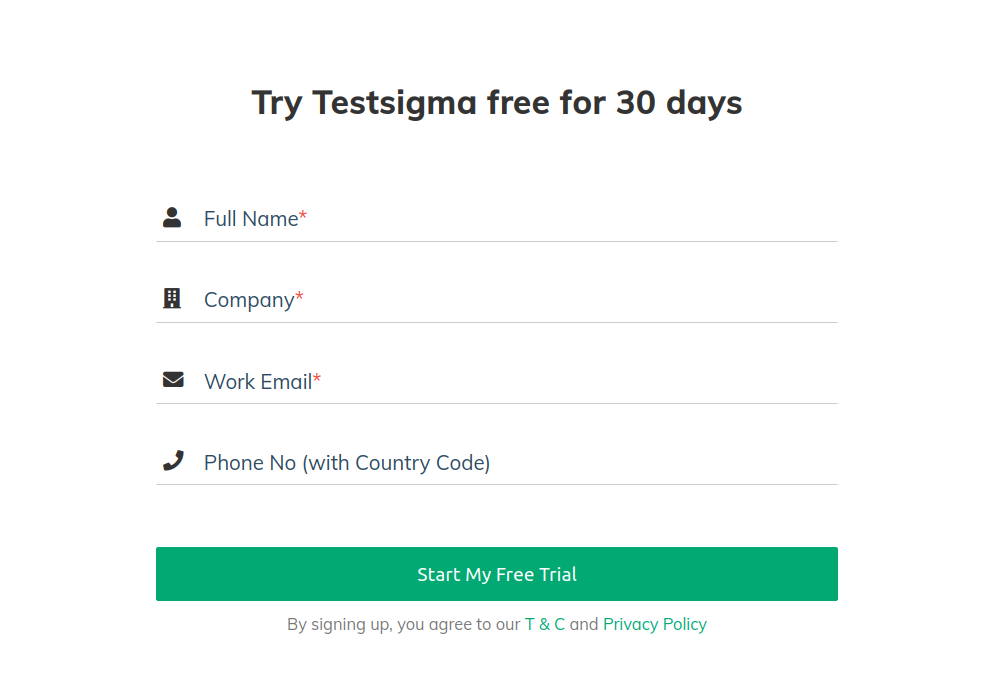
In order to use TestSigma tool for your API Testing, you need to have an account with TestSigma. You can sign up here to create a Free Trial Account.
- Some Important Resources
In order to get started with the API Testing, we will be using some fake data using a free online service called JSONPlaceholder. This is very useful for inspection. In the table below, we have specified some URLs for requests and the total number of json objects that would be returned as part of the response for each URL.
- Some Important Routes
We will be using routes similar to the ones mentioned in the below table throughout this example to perform API Testing.
| https://jsonplaceholder.typicode.com/posts | It will return a response which will contain 100 posts. |
| https://jsonplaceholder.typicode.com/posts?userId=1 | It will return a response which will contain all the posts for the user with ID = 1. |
| https://jsonplaceholder.typicode.com/posts/1 | It will return a response which will contain the post with ID = 1. |
| https://jsonplaceholder.typicode.com/posts/1/comments | It will return a response which will contain comments of the post with ID = 1. |
| https://jsonplaceholder.typicode.com/comments | It will return a response which will contain all the comments (500 in total). |
| https://jsonplaceholder.typicode.com/comments?postId=1 | It will return a response which will contain all the comments for Post with ID = 1. |
| https://jsonplaceholder.typicode.com/users | It will return a response which will contain all the 10 user’s details. |
| https://jsonplaceholder.typicode.com/users/1 | It will return a response which will contain the details of the user with ID = 1. |
Create a Project
To start with, let’s create a project for API Testing.
On the top left corner of your dashboard, click on the + icon and then click on the project button.
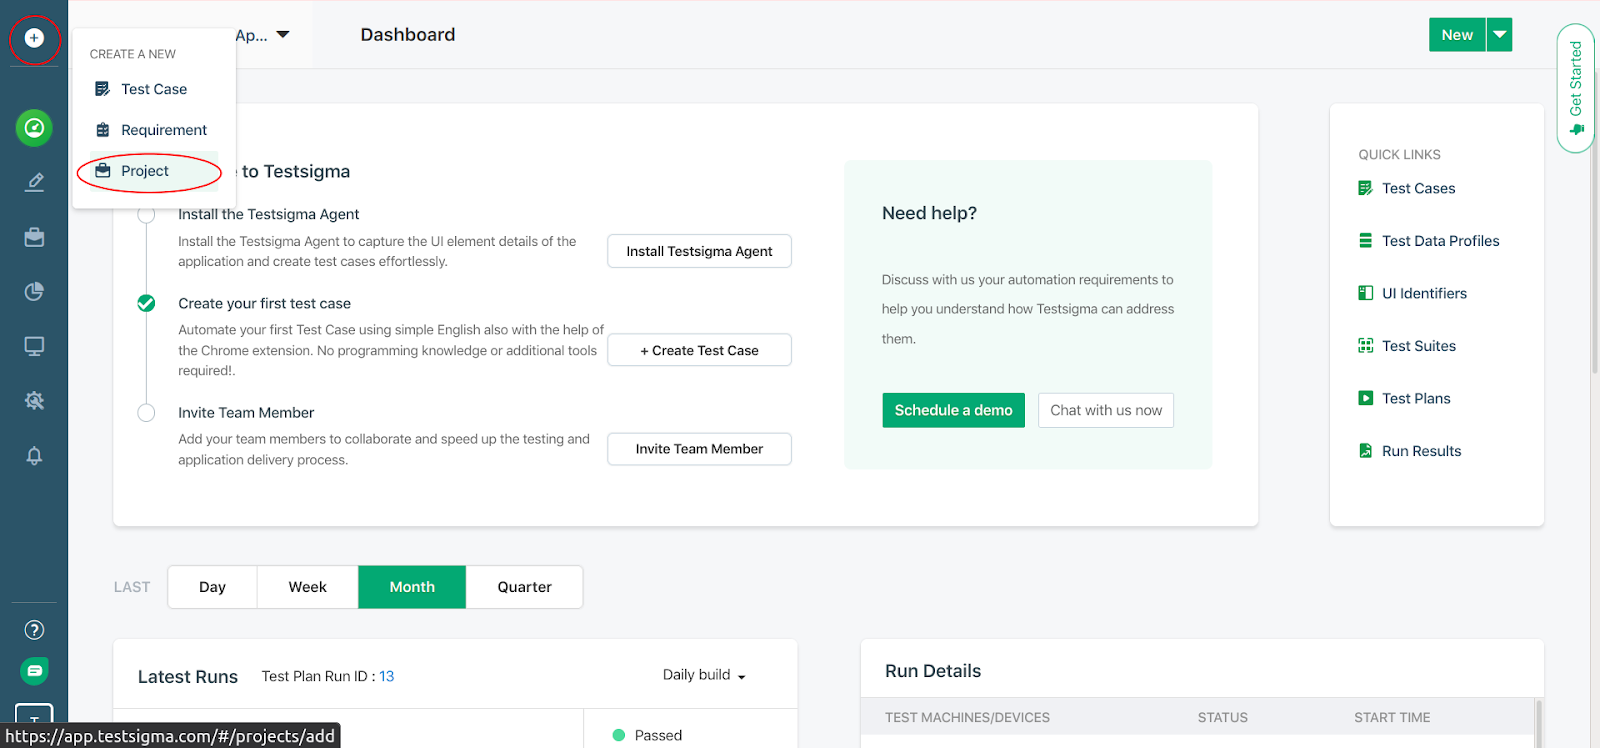
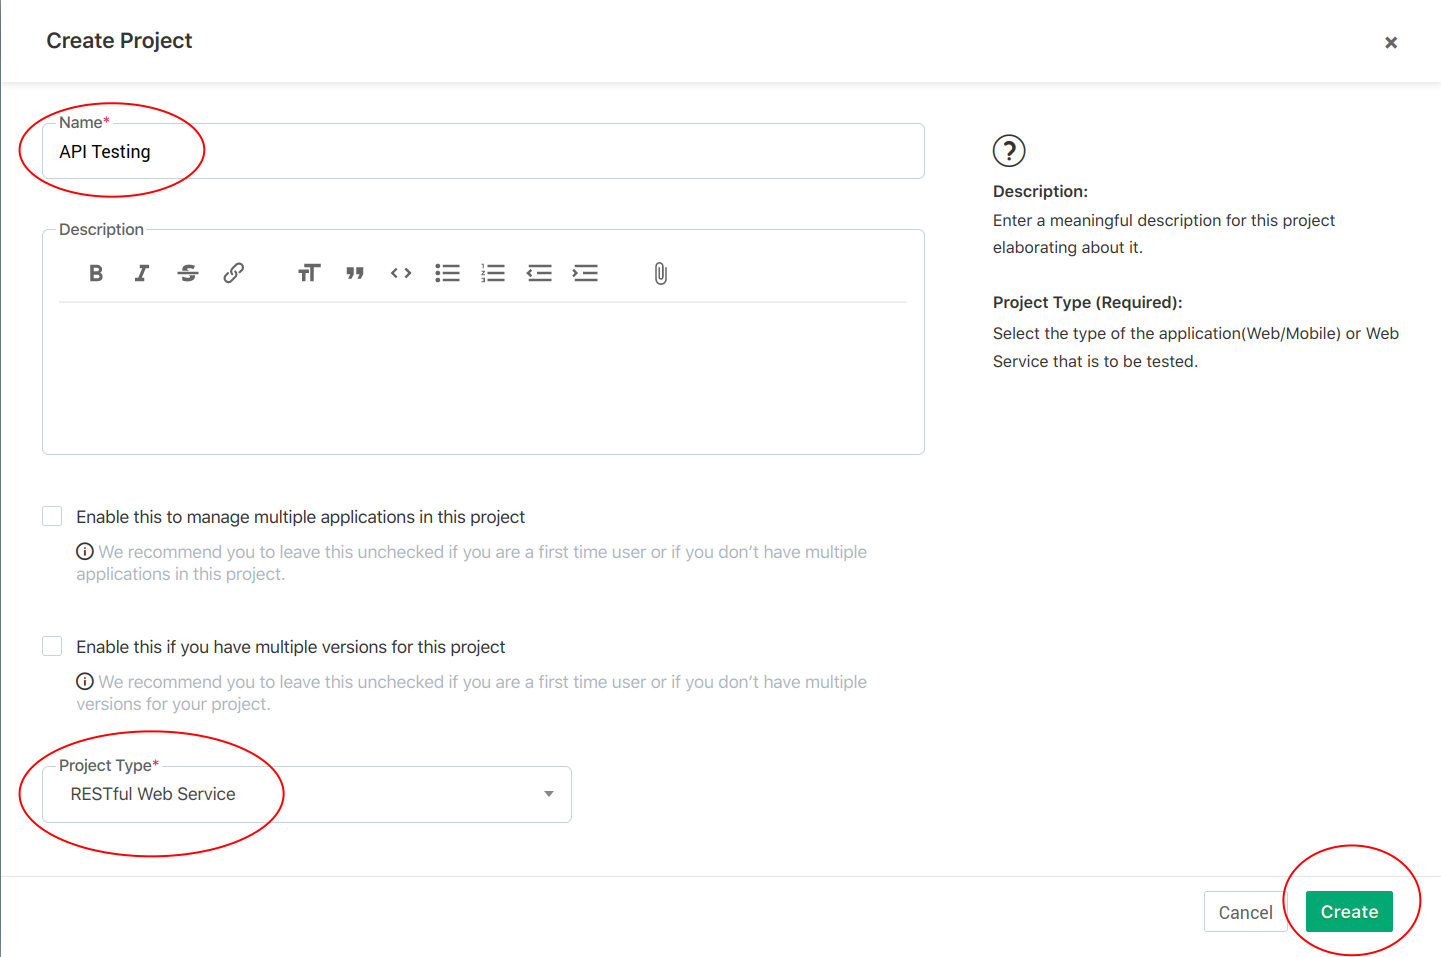
After that, choose a name for your project and for the project type, select “RESTful Web Service”. Click on the create button to create the project.
Creating a Test Case
After you have created your project, we can now move on to the next step which is creating a Test Case.
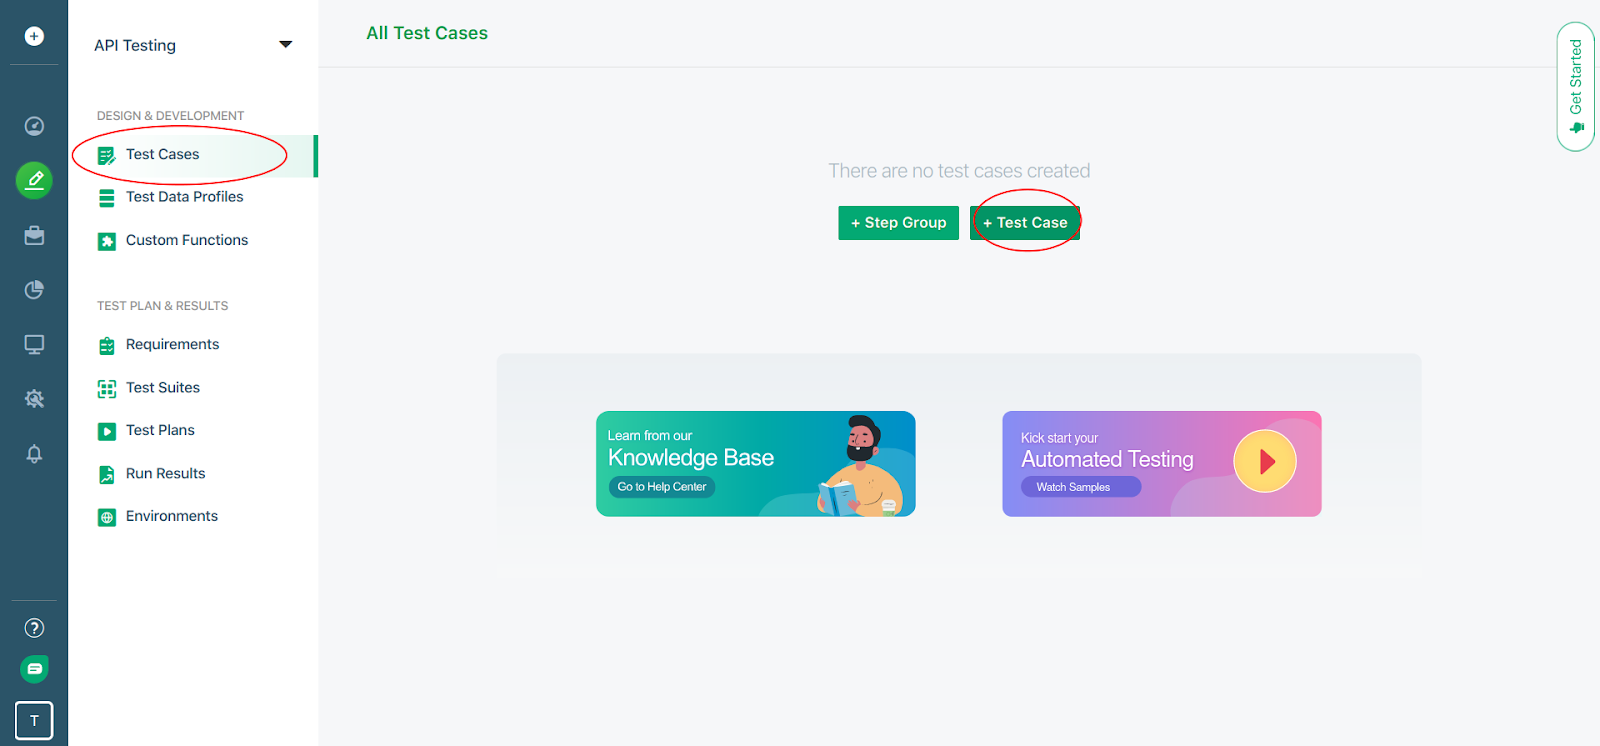
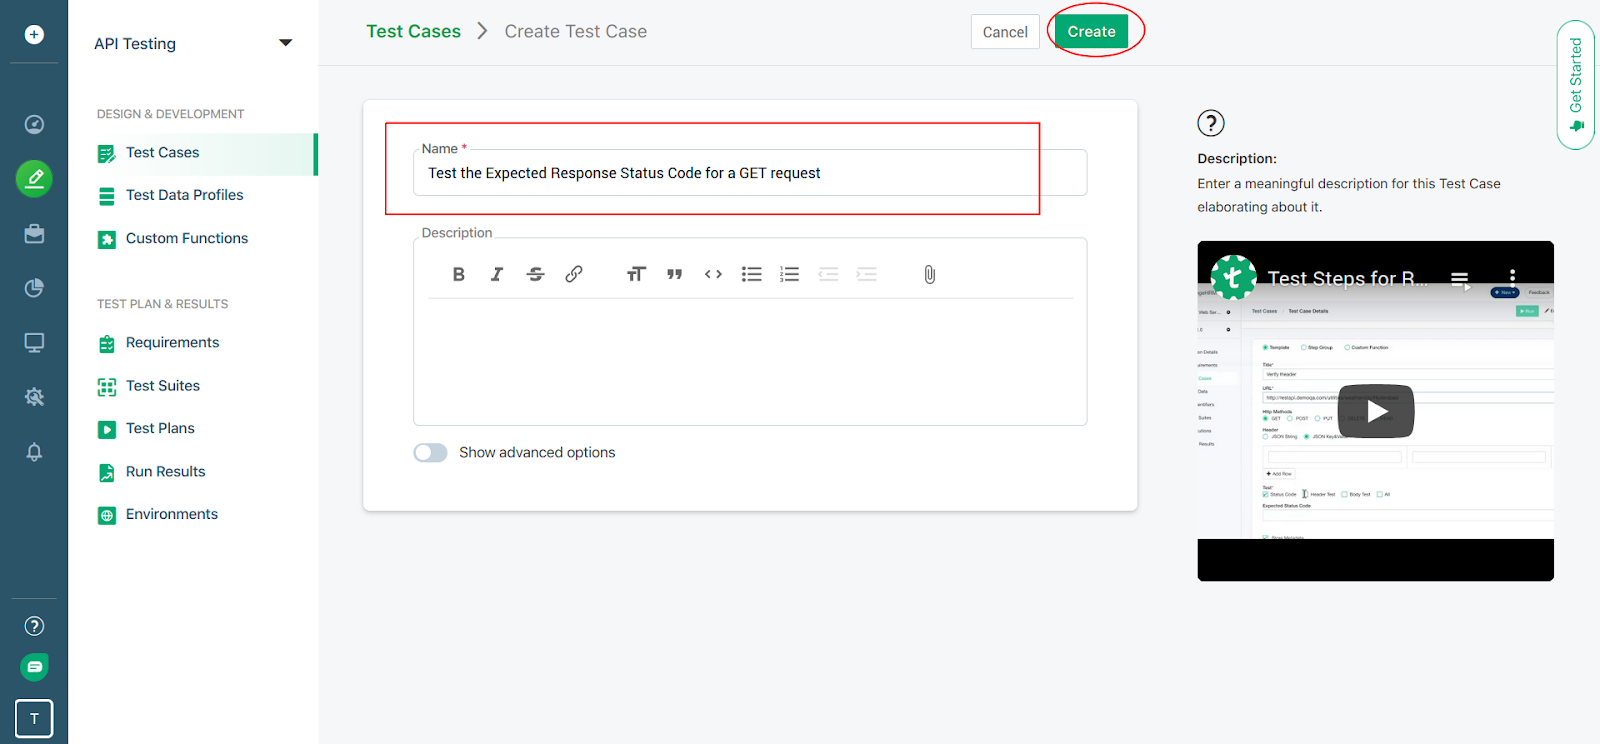
To create a Test Case, in the left context menu, under Test Development, select the Test Cases option. And then, click on the “+ Test Case” button.
It will now ask you to enter the Test Name. After entering the test name, click on the Create button.
In this article, we will demonstrate 3 different cases with different HTTP Verbs (GET, PUT, POST, DELETE) using which you can perform your API Testing.
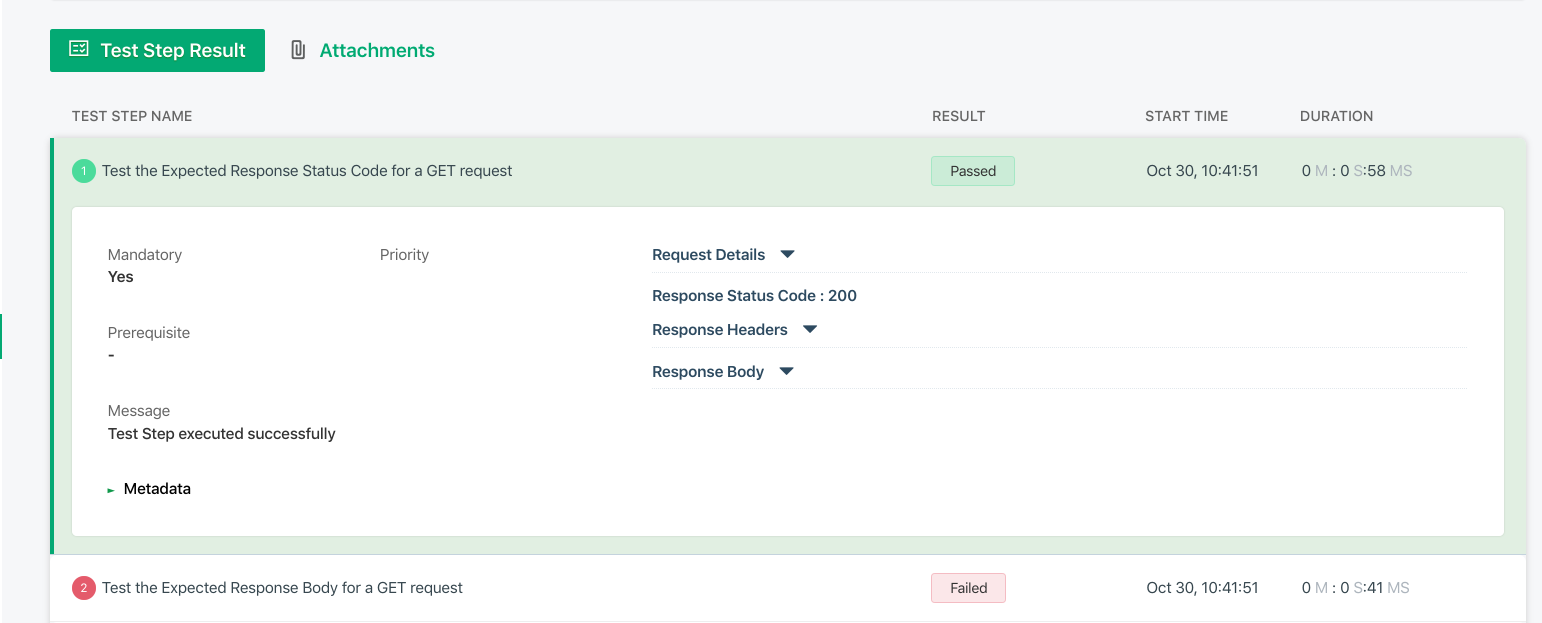
1. Testing the Expected Response Status Code for a GET Request.
After you have created the Test Case, it will take you to the Test Details page shown below.
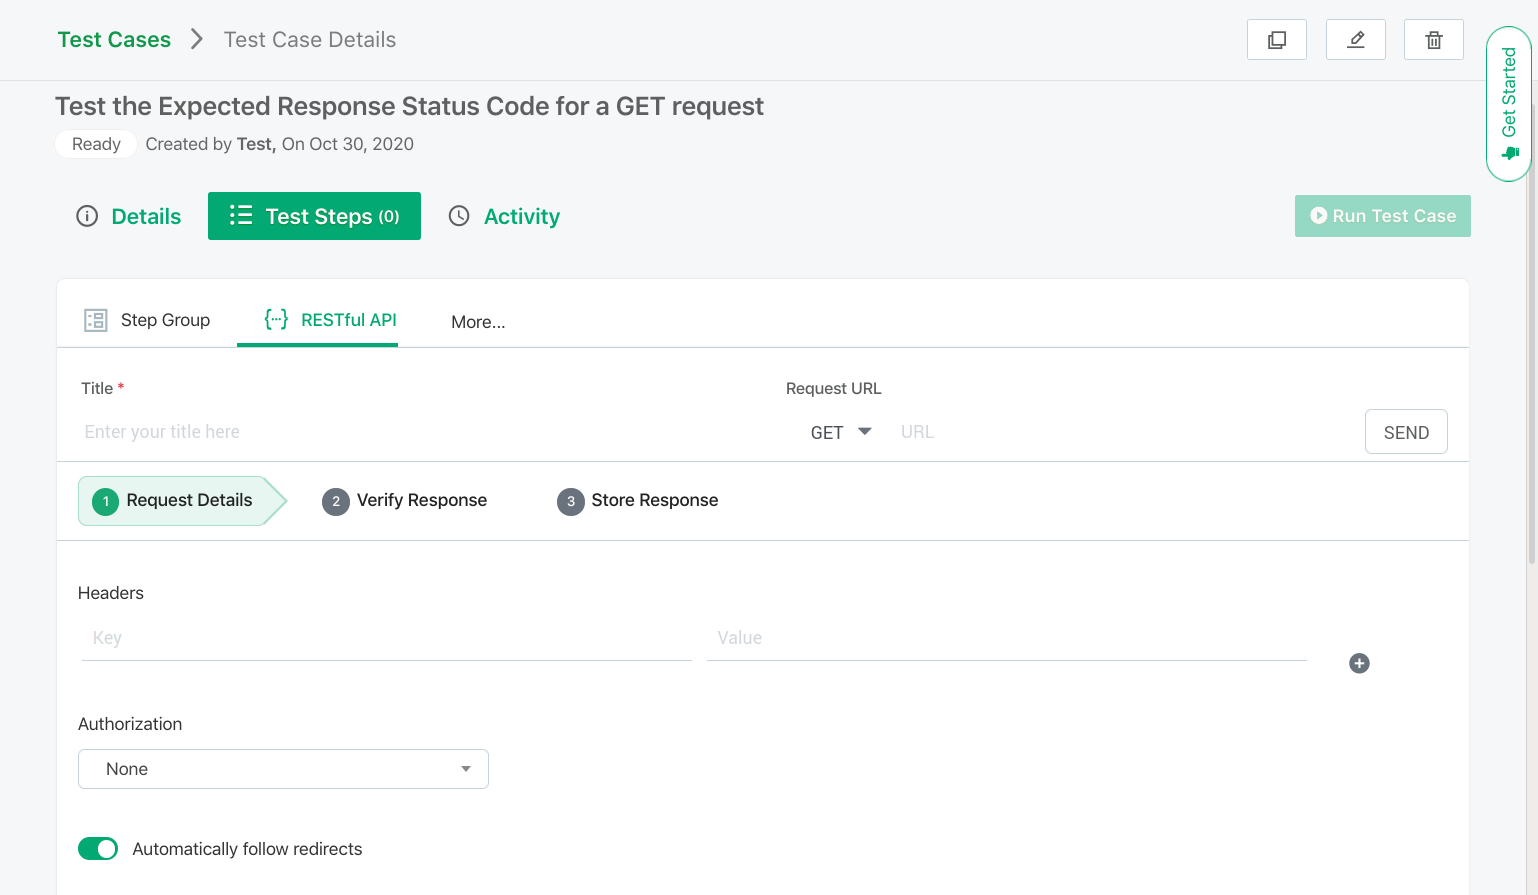
Here, we will test the expected status code for the response of a simple GET request. The entries required for this test are –
- URL – https://jsonplaceholder.typicode.com/users
- HTTP Method – GET
- Test – Status Code
- Expected Status Code – 200
We will now fill the same details in the Test Case Details.
- Enter the title of your test step.
- Select the HTTP Method (GET) from the dropdown menu.
- Enter the URL.
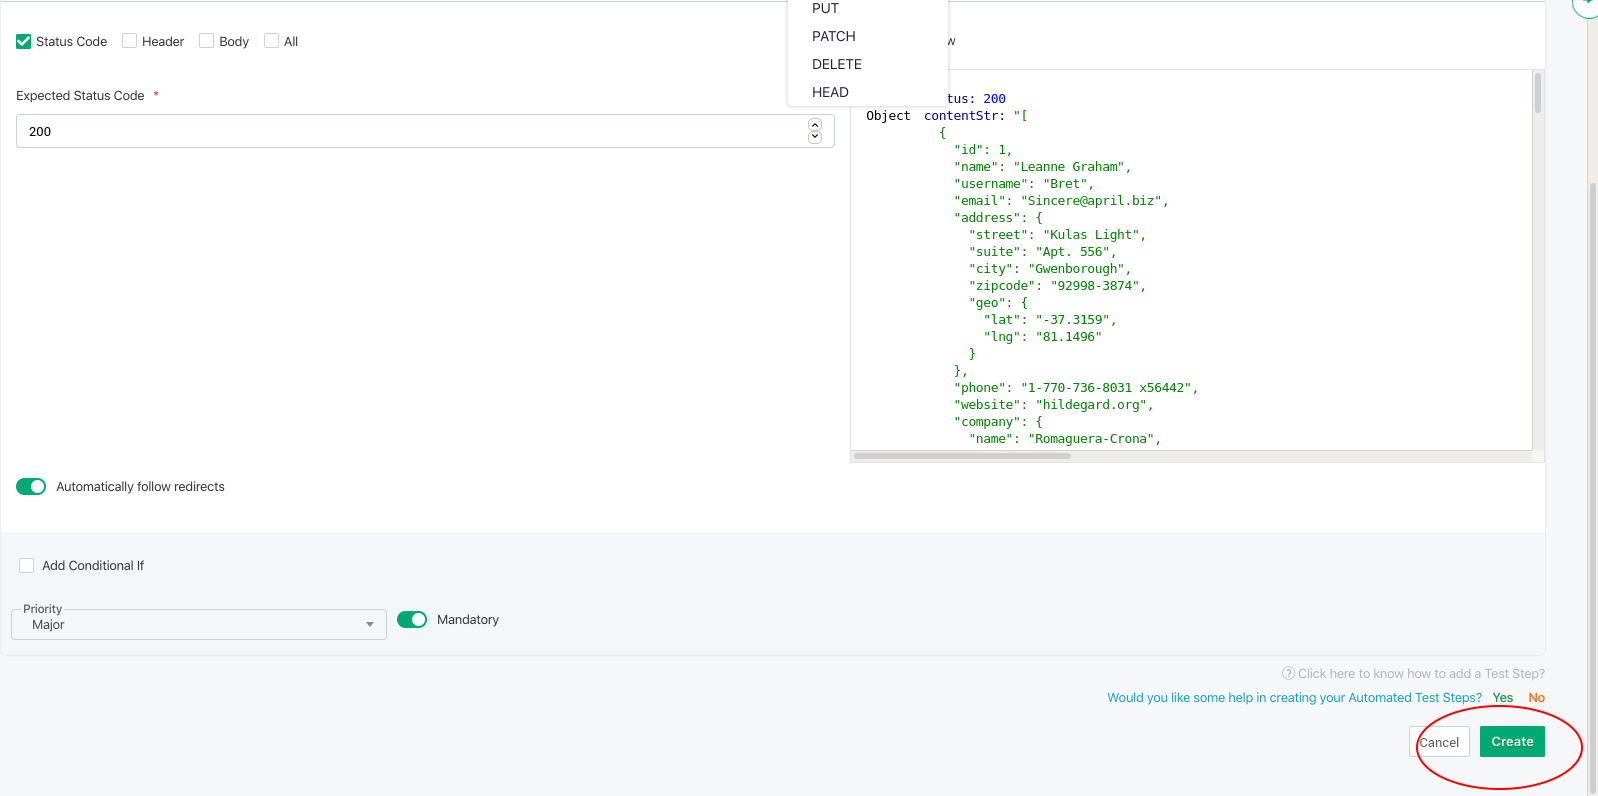
- Inside the verify response tab, check the status code option and enter the expected status code.
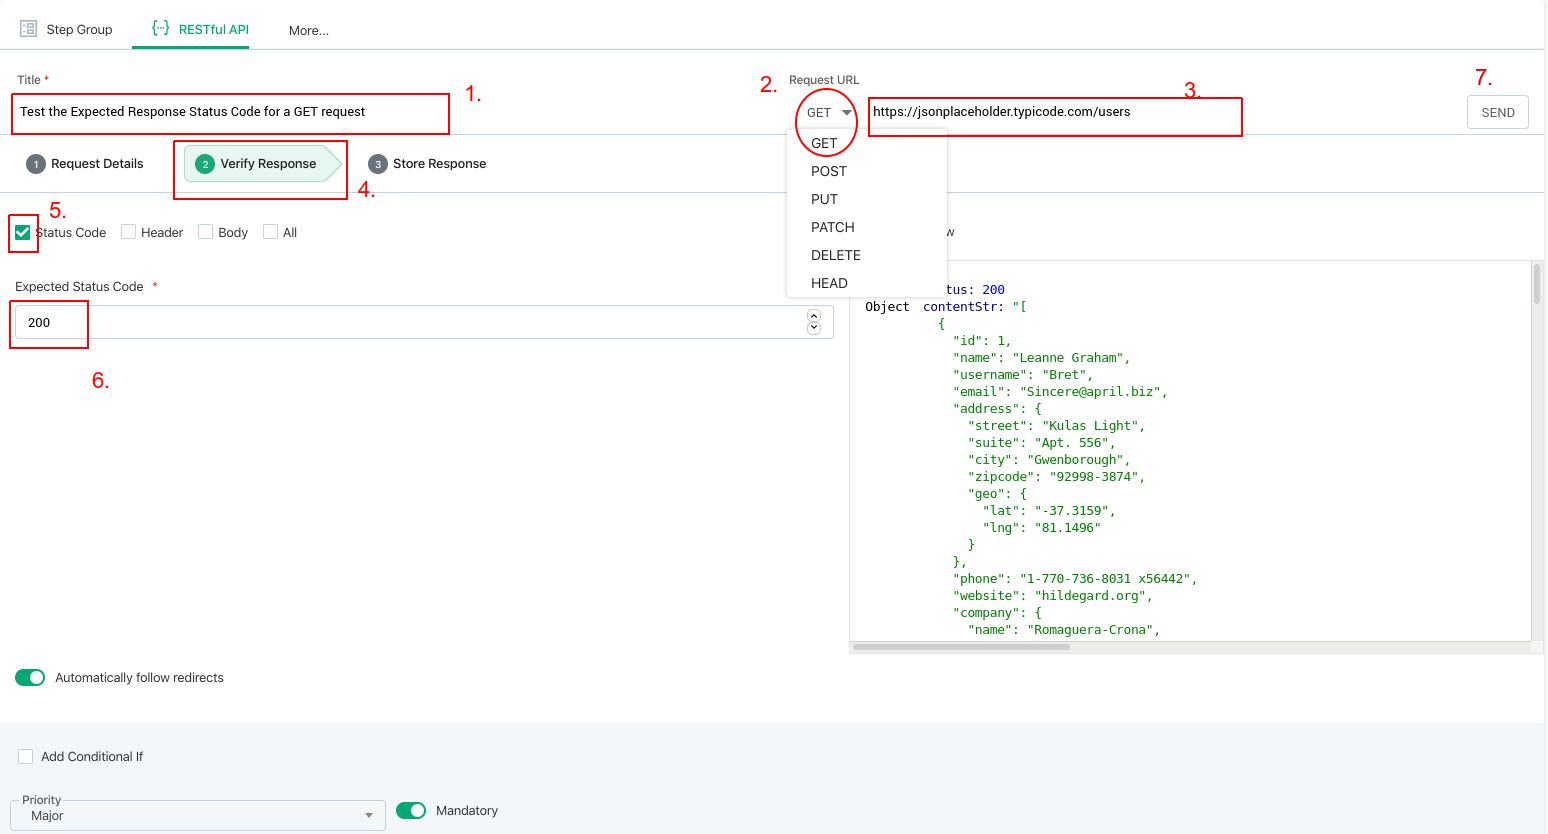
After entering all the details, click on the Create button below. Your Test Step will be created and on the same page, you can create other test steps as well.

We will follow the same steps to create all our Test Steps.
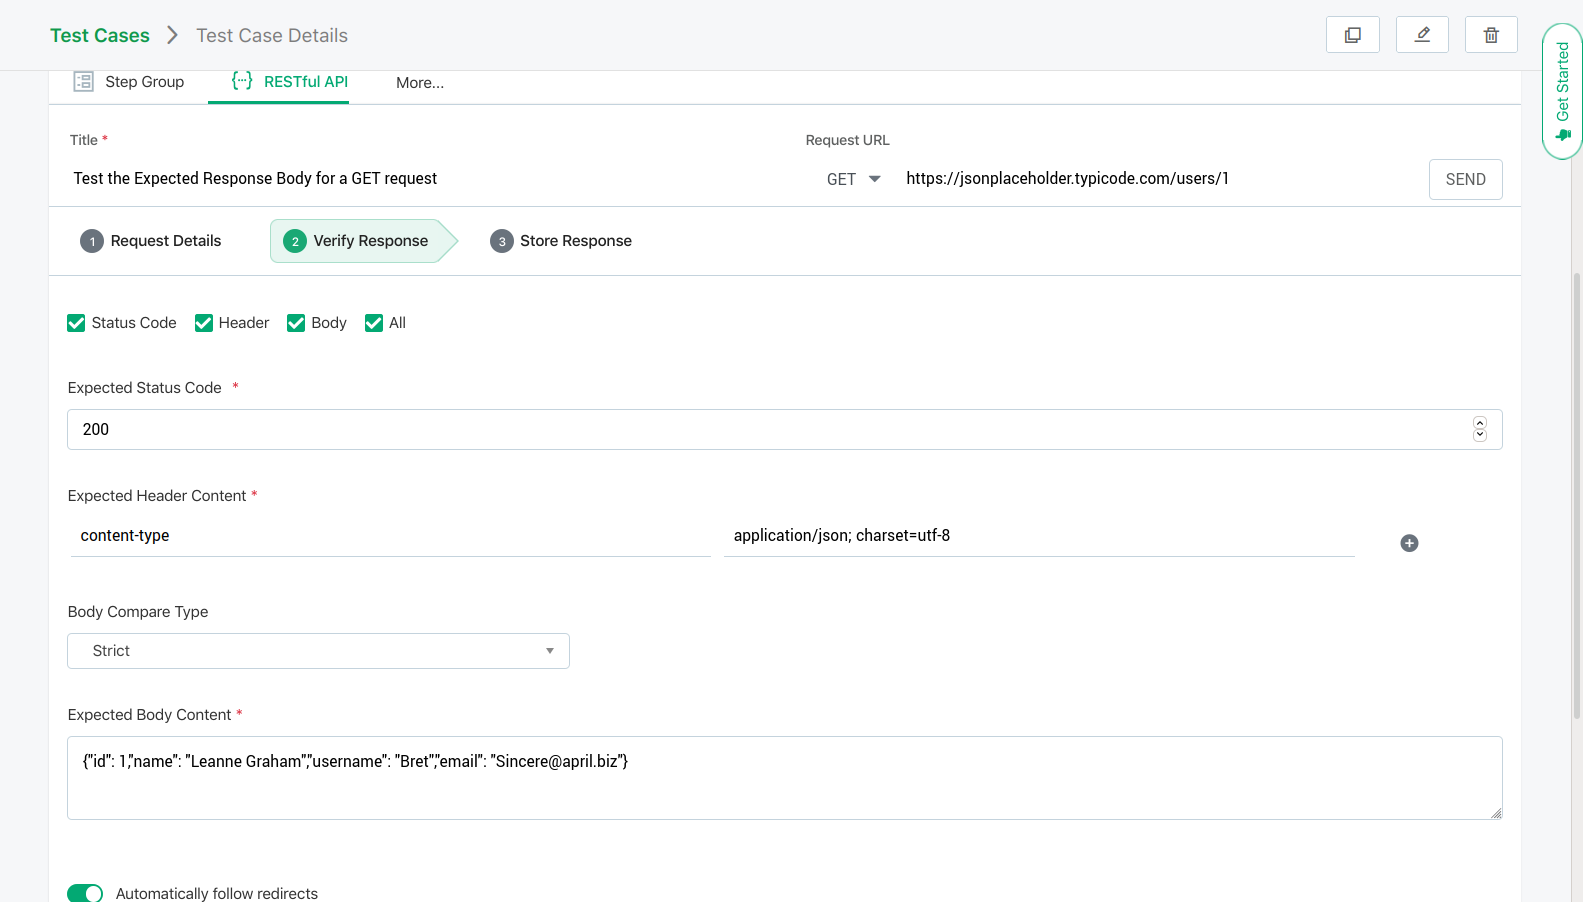
2. Testing the Expected Response Body for a GET request
Here, we will be testing the expected body content of a response for a simple GET request.
Parameters –
- URL – https://jsonplaceholder.typicode.com/users/1
- HTTP Method – GET
- Test – Body Test
- Expected Body Content – {“id”: 1,”name”: “Leanne Graham”,”username”: “Bret”,”email”: “[email protected]”}
- Body Comparison Type – Lenient
- Expected Header Content – {“content-type”:”application/json; charset=utf-8″}
After entering all the details, your test step should look like –
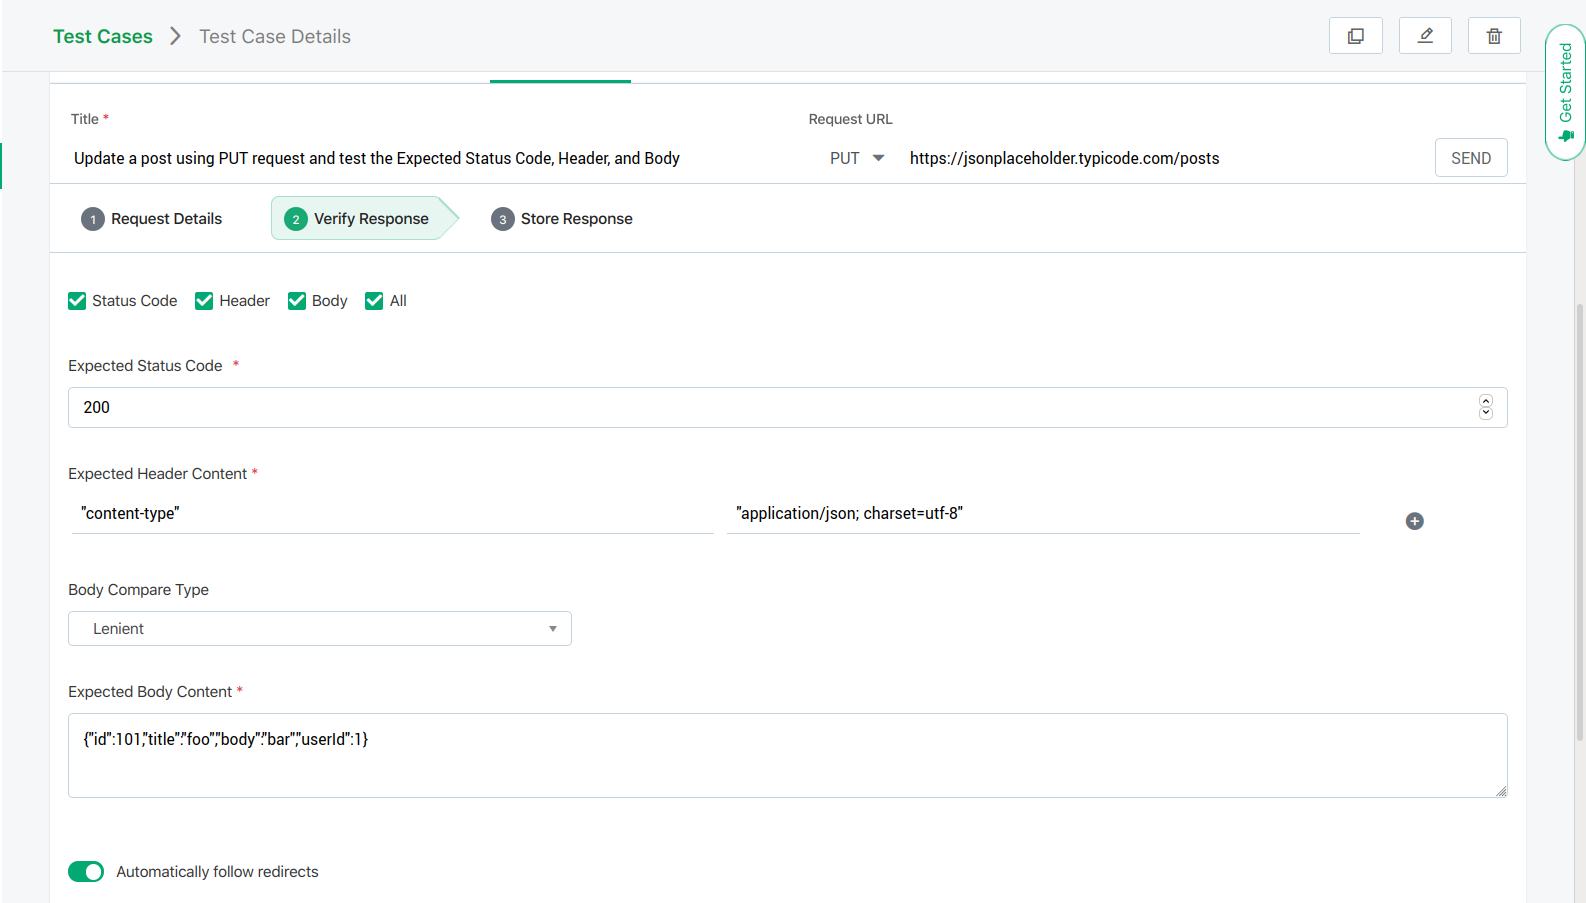
3. Updating a post using PUT request and test the Expected Status Code, Header, and Body
Here, we will update a post using the PUT request and test the Expected Status Code, Header and Body Content.
Parameters –
- URL: https://jsonplaceholder.typicode.com/posts
- HTTP Method: PUT
- Payload: {“title”:”foo”,”body”:”bar”,”userId”:1}
- Test: All(Status Code, Header Test, and Body Test)
- Expected Status Code: 200(updated), 201(created) or 204(no content)
- Expected Header: {“content-type”:”application/json; charset=utf-8″}
- Comparison Type: Lenient
- Expected Body: {“id”:101,”title”:”foo”,”body”:”bar”,”userId”:1}
- Comparison Type: Lenient
After entering all the details, your test step should look like –
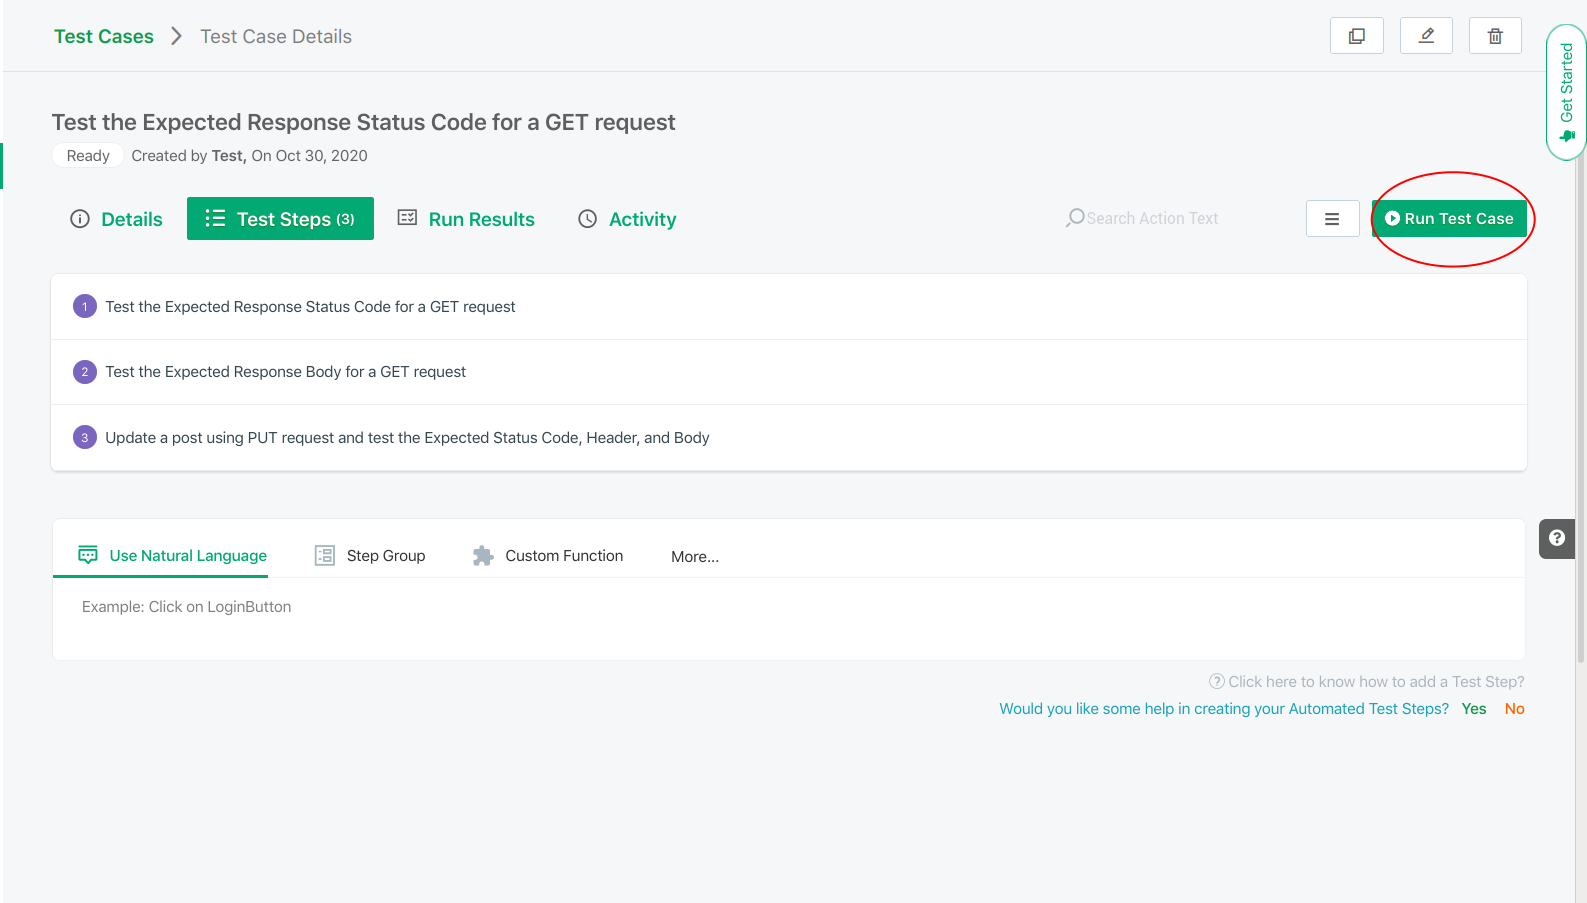
After creating the 3 test steps, we are now ready to execute the Test Case.
Executing the Test Case
To run the Test Case, click on the “Run Test Case” button.
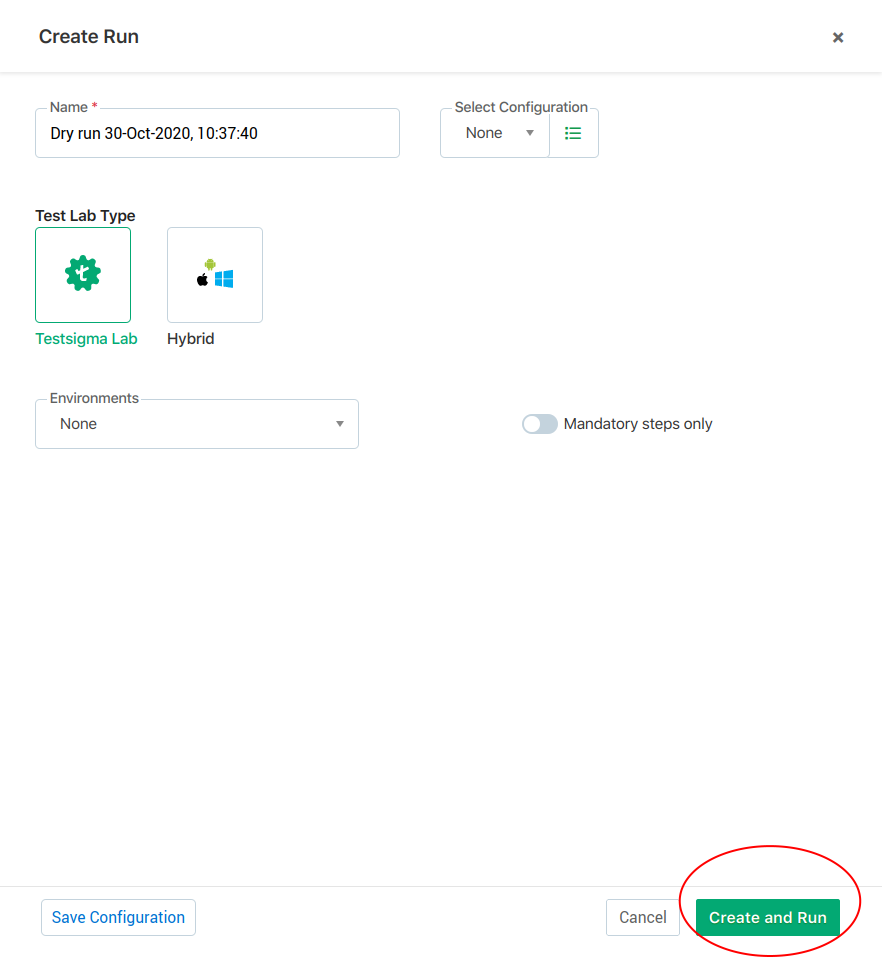
You will now be asked to enter the name and test lab type. We recommend you to use the default inputs for both the fields. The default test lab type is TestSigma Lab and the name is a combination of “Dry Run” and the current date and time. Click on the Create and Run button.
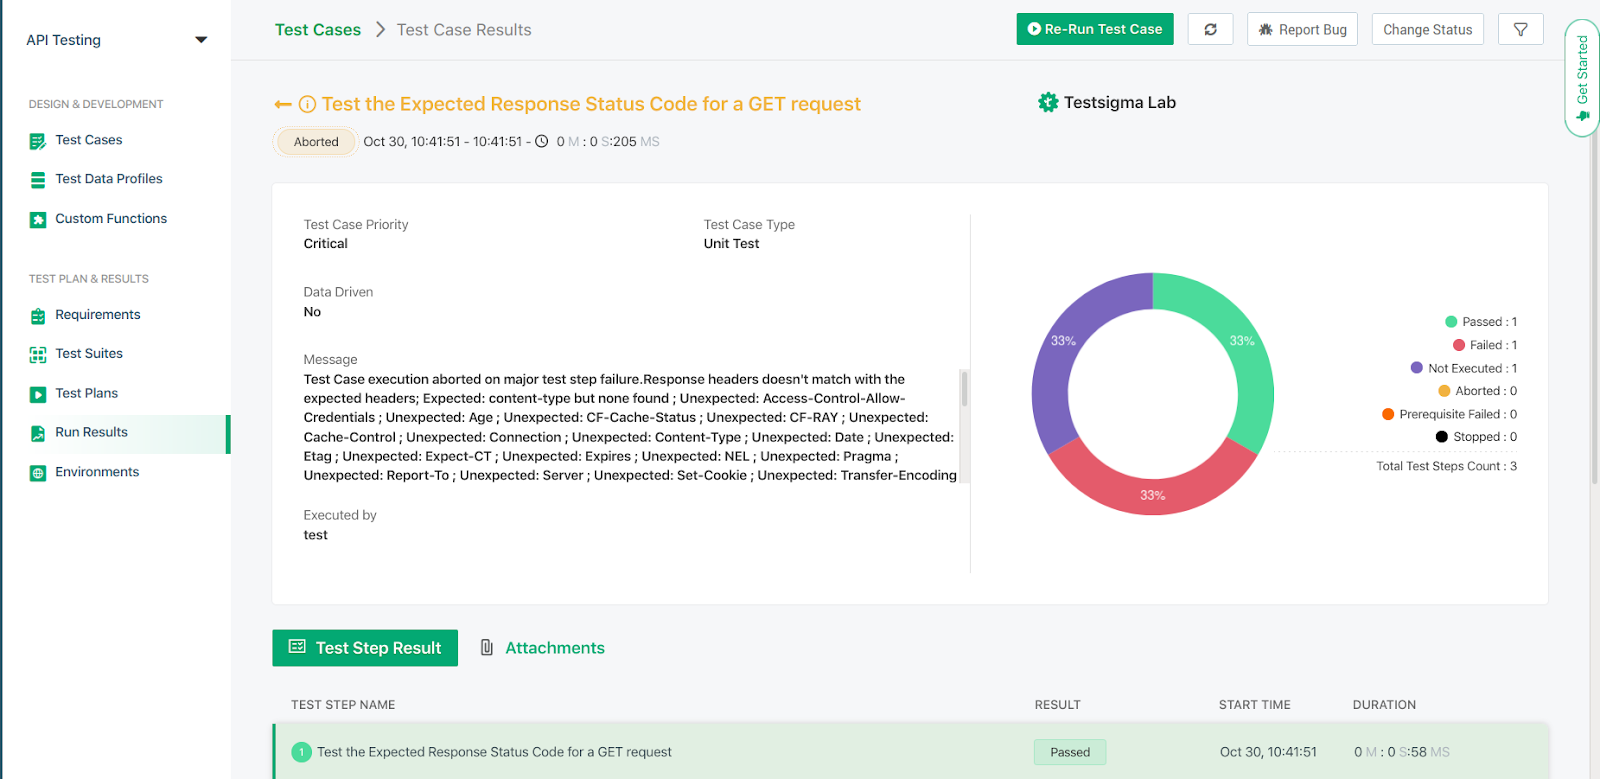
Analysing the Results
You can now get a detailed report of your Test Case execution on your screen. You can check the number of test cases passed, failed and not executed along with the Test results.
No doubt, API Testing, and other Web Services Testing is one of the most important components in the Testing Phase of any project. Without proper API Testing, the webpages may fail to serve or serve with an improper error code. TestSigma tool provides a plethora of features to allow you to perform enhanced API Testing using all the major HTTP methods and other key components such as Header, Body Contents, and Status codes. With the ability to create Test Steps in natural language, TestSigma Tool makes it really easy for developers to create high-quality Test Cases and allows the developers to determine the point of failures easily with a detailed description of Test Case execution.